0

Yellow VS Red Brass – Which Should You Use?

Posted by Unknown on 04:17 in , ,

When you mix together varying amounts of copper and zinc, you are left with a metal known as brass. Different rations of both copper and zinc result in different types of metal, two of the more popular being yellow (which is sometimes called gold, but they really are two different types) and red (which is also known as rose). So, if you are in need of brass for an upcoming project, which of these two should you be using?

Red
Brass
This brass is so named because it has a reddish hue that is caused by the high concentration of copper it is comprised of. It is commonly used in the construction and mechanical industry (especially in components like valves, sprinklers and pumps) and is also the metal of choice for the production of musical instruments.

Yellow
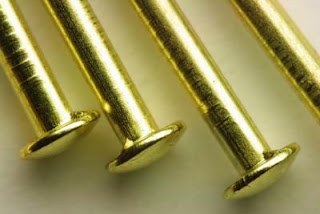
This brass is so named because it is yellow in colour and is very shiny (hence why it is sometimes called gold). It is commonly used in applications around the home (such as faucets, screws and bolts), but it also has uses in the production of musical instruments and is commonly used for the creation of costume jewellery (as it looks like gold).
Yellow Brass

There are many similarities between these two types of brass, including the fact that they are both comprised of copper and zinc. They are also both used in the production of musical instruments (as the type of brass used in the tube or horn actually alters the sound that is produced). The plumbing and electrical industries also use either red or yellow brass in their work, as both types are flexible and extremely strong.

The main difference between yellow and red brass, however, is the copper content (which results in the differences in colour). Fortunately, this gives you the means of determining which type of brass you are dealing with if you are ever unsure – take a file to sand at an inconspicuous area of the object. An orange-y residue means that you are dealing with red, whilst pale yellow shavings suggest yellow.

Both red and yellow brass can be recycled, making them both quite an environmentally friendly material choice. Whilst the red type can be recycled as is, however, the yellow type will need to be purified first to remove any other metals that have been used in its composition. This is because red brass consists of at least 85% copper, whilst the yellow type will only have 60% copper or less in its makeup.

0

How To Darken (Or Age) Brass

Posted by Unknown on 21:31 in ,

Older Brass
If you are the kind of person who prefers the look of older brass – which is slightly darker and has a distinctive ‘antique’ appearance to it – you might be patiently waiting for your newer pieces to develop this aged look. Fortunately, it is possible to speed up this aging process, leaving your metal looking much darker and more attractive.

Step 1: Find an acetone-based product that you can use to remove the varnish layer from the brass object (if one exists). Nail polish remover is a great product to use for this.

Step 2: Leave the acetone on the surface of the brass for a few minutes, then use a clean cloth to rub vigorously at the surface. This should have removed the varnish layer.

Step 3: Find a dishwashing liquid that contains sodium bisulphite, as this will cause the metal to darken. Take another clean cloth and use it to work some of the liquid into the brass.

Step 4: Leave the dishwashing liquid on the brass until you are happy with how much it has darkened. Then, wash the liquid away using some clean water and dry immediately.QCDVDMWNVUXN

As you can see, the method used for darkening (or aging) your brass is actually quite simple – it really shouldn’t take you any longer than an hour, even if you are taking your time. Once you are finished and have completely dried your metal, you should be left with a brand new object that looks as if it has been around for decades.

0

How To Stop Your Copper Jewellery From Turning Your Skin Green

Posted by Unknown on 21:17 in ,
As copper is a fairly inexpensive metal that is widely available, it is commonly used for the creation of jewellery. As the metal oxidizes, however, it is known to turn the skin it touches green. Unfortunately, this oxidization can be difficult to prevent, as everyday we come into contact with a number of substances that bring this about, including the chemicals in soaps and even our sweat.
Copper
To prevent your copper jewellery from oxidizing whilst wearing it, at least for a time, you should do the following:
  • If you are unsure whether you are allergic to nail polish or not, apply a small amount to your skin and leave to dry. If you don’t notice a reaction of any kind (such as a rash, itchiness or hives) you are free to continue.
  • Coat the inside surfaces of your copper jewellery with a layer of clear nail polish. If there are other areas of the jewellery that touch your skin, make sure that you coat these, too.
  • Leave the nail polish to dry completely be wearing the copper jewellery. Keep in mind that this protective coating will wear away over time, so you should reapply the nail polish if you notice the green marks reoccurring.
If your copper or other metals(Aluminium, Brass ) jewellery does leave green marks on your skin, there is no need to despair, as these stains can be easily removed. Simply wash the affected area using soap and water; the marks should lift right off. The nail polish method outlined above should be suitable for all types of copper jewellery, including bracelets, necklaces and earrings.

0

Why Copper is important for industry use?

Posted by Unknown on 22:25 in , ,
Industrial Copper
Copper was one of the first metals ever extracted and used by humans, and it has made vital contributions to sustaining and improving society since the dawn of civilization. Copper is a relatively inexpensive and extremely plentiful metal with numerous useful properties. It effectively resists corrosion and is a very effective conductor of both electricity and heat.
  • While building construction accounts for more than 40% of all copper use, residential construction is about two-thirds of the building construction market. In the modern times, copper is used for various purposes across diverse industries, but there are four major uses or application areas of copper. These four uses include: Use of Copper in Electrical Industry; Use of Copper in Construction Industry; Use of Copper in Industrial Machinery; and, Use of Copper as an Alloy.
  • The common uses of copper in the construction field include using it for welding and soldering; use in brazing applications; use for making lightning rods; and, use in plumbing applications (like making pipes and fittings from copper). The use of copper has also been promoted in the modern concept of green houses and green buildings.
  • Presently, copper is used in building construction, power generation and transmission, electronic product manufacturing, and the production of industrial machinery and transportation vehicles. Copper wiring and plumbing are integral to the appliances, heating and cooling systems, and telecommunications links used every day in homes and businesses. Copper is an essential component in the motors, wiring, radiators, connectors, brakes, and bearings used in cars and trucks.
  • The average car contains 1.5 kilometers (0.9 mile) of copper wire, and the total amount of copper ranges from 20 kilograms (44 pounds) in small cars to 45 kilograms (99 pounds) in luxury and hybrid vehicles.
Copper occurs in many forms, but the circumstances that control how, when, and where it is deposited are highly variable. As a result, copper occurs in many different minerals. Chalcopyrite is the most abundant and economically significant of the copper minerals. The dramatic rise in need for copper will naturally increase the demand for new mines and processing plants, as current facilities are upgraded and expanded. Therefore copper is one of most important metal used in industries all across the Globe.

0

How To Remove Grease From Metal

Remove Grease From Metal
There are plenty of ways that metal objects and components can become coated with grease around both the home and the workplace. In the kitchen, grease can come from fried foods (like bacon and even fish), whilst in the workplace it is sometimes needed to lubricate moving parts. If you want to remove greasy coatings from your metal, you should do the following:

Step 1: Using paper towels, wipe away as much of the grease as you can. For overly thick coatings, you can use a plastic scraper in conjunction with the paper towels.

Step 2: Take a soft cloth and apply a little rubbing alcohol to it, then use it to rub at the metal until the grease disappears. For stubborn coatings, you may need to reapply the alcohol and rub for minutes at a time.

Step 3: If you don’t want to use rubbing alcohol, you can put a few drops of a grease-cutting dishwashing liquid on the metal and wipe it away using a soft cloth or a scrubber. Finish by rinsing with clean water.

Step 4: For shiny metals, take a soft cloth that you have sprayed with some household vinegar and wipe it off.

If you cannot completely remove the grease from the metal the first time around, you may need to repeat the method that you have chosen. Keep in mind that, even though there are a number of degreaser products around, they should not be used on aluminium or lacquered metals, as it can be extremely damaging to the surface.

0

A Guide To Welding Aluminium

Posted by Unknown on 22:51 in , ,

Even the most professional and experienced welders will often comment that aluminium is the hardest metal to work with, simply because there is a number of different chemical properties that must first be understood. Some of these properties include the fact that aluminium doesn’t change colour when it’s heated and that it has a far wider range of melting temperatures than other types of metal. This means that extreme care must be taken to ensure that you are welding the metal correctly.

The melting point of aluminium oxide
Aluminium Welding
One of the first things that you must realize is that aluminium oxide actually has a higher melting point than its base alloys – it won’t start to melt until it reaches 2,050 degrees Celsius. Unless you displace the oxide, you will also be left with a weld that is incomplete. This can lead the connection to crack, break or even to shrivel in size.

The thermal conductivity of aluminium is higher
Another thing that you must understand about welding this metal is that the thermal conductivity is higher because it has to work with a fairly specific amount of heat. This means that aluminium will be more sensitive to the different heat fluctuations that may occur during welding; this could cause the metal to crack or warp.

A higher level of electricity is necessary
When welding aluminium using the arc method, you will need to have a much higher level of heat, because the metal conducts electricity at much higher levels than other metals. This does, however, permit the welder to use a gun that holds longer contact tubes, as the electrode doesn’t get heated the way it does with other methods.

Safety should be your primary concern when welding metal, so you should ensure that you always wear gloves and a helmet. It is also a good idea to wear a long sleeved cotton shirt, as this will protect your skin from being burned by the UV radiation produced.

To ensure that you are able to effectively weld aluminium, you will need a variety of tools, including: a TIG welder (otherwise known as a Tungsten Inert Gas Welder), a pair of strong gloves and a good protective helmet. You will also require a gas to ensure that the weld is perfect. You cannot use argon by itself, but a number of welders say that an argon and helium mix tends to work best with aluminium. Make sure that you have a steel brush on hand to effectively clean the metal as you go.


0

How To Remove Scrap Metal From Your Home

Posted by Unknown on 21:32 in ,

Scrap Metal
Every year, tens of thousands of appliances across the world reach the end of their lives and cease working. More often than not, these appliances will eventually find their way to landfill but, by removing the non-metal components, did you know that you can actually recycle them? Use the following instructions for getting rid of all this scrap metal from your home.

Step 1: Move all of the appliances and other scrap items to the area where they will be disassembled. A garage or carport is a great place to do this. Make sure that you have a helper on hand in case some of the scrap is overly heavy.

Step 2: Using your toolbox, begin to disassemble all of the appliances in your collection. Throw all non-metal components into a rubbish bin so that they can be taken to landfill.

Step 3: Load all of the scrap metal into the back of your car or into a trailer to transport to the dealer. If the objects will be open to the air, make sure that you cover them with a tarp to prevent them from falling out.

Whilst it is possible to taken broken down appliances directly to scrap metal dealers and let them remove all of the non-metal components for you, this will actually generate less of a profit. This is why it is best to remove anything that cannot be recycled from the appliance before you load it up. Whilst taking apart your appliances, make sure you wear the proper safety gear.

0

What Molds Are Used For Aluminium Casting (Part 2)

Posted by Unknown on 22:15 in , ,
Aluminium
In part one of this article, we looked at the first four molds that are commonly used in the process of aluminium casting – sand, ceramic, permanent and die casting ones. Now, in part two, we will look at the final three molds and the ways in which they are used to create the various aluminium components that are regularly used across a number of industries.
  • Shell: This mold is actually a form of the sand casting one and utilizes resin the bond the sand into a thin shell. This is, however, the more expensive of the two methods, although it is highly effective in producing a better surface on the aluminium component.
  • Plaster: These molds are created using a plaster mixture that is poured around some wax or foam. The mold is then baked, allowing the wax or foam to melt away and leaving a perfect copy of its shape. Molten aluminium is then poured into the cavity.
  • Graphite Casting: This mold is often used in conjunction with aluminium centrifugal casting. The metal is forced into the mold where it is rapidly chilled. The resulting component cannot be created using any of the other processes.
Each of the seven molds outlined in parts one and two of this blog have long been used to craft the various aluminium shapes and forms that are used in construction and other related industries everyday. By familiarizing yourself with each of the descriptions, you should be able to determine which mold will best suit your needs, resulting in perfectly casted metal every time.

0

What Molds Are Used For Aluminium Casting (Part 1)

Posted by Unknown on 22:23 in , ,
Did you know that all of the aluminium components used in industries across the world have been created through a casting process? The molten metal is poured into molds where it sets and becomes the different shapes and forms that are needed for construction and other industrial applications. But what types of molds are used to cast aluminium and how does each work?
Aluminium


  • Sand Casting: This is the oldest type of mold for casting aluminium; it was being used back in the time of the ancient Egyptians. Sand is held in a box and a cavity is created (using a solid material, like timber) whereby the molten metal is poured in. 
  • Ceramic: This mold is created around a plastic or wax shape that melts when the mold it fired. Once the wax or plastic has melted away, the mold is ready to receive the molten aluminium. This process is also known as ‘precision casting’. 
  • Permanent Casting: These molds are crafted from metals like steel and iron. The aluminium is forced into the cavity, using either gravity or a vacuum. The difference with these molds is that they can be reused again and again. 
  • Die Casting: These molds use steel dies to produce a number of castings that are identical. Under high pressure, the molten aluminium is forced into these cavities. It is favoured for being a versatile process, enabling the creation of small to medium castings. 


In part two of this blog, we will take a closer look at some of the other molds that are commonly used in aluminium casting, including shell, plaster and graphite casting ones. These are known for being a little more complex and uncommon than the four outlined above.

0

What makes Brass a valuable metal?

Posted by Unknown on 21:21 in , ,
BRASS
Brass
  • Brass is an alloy of copper and zinc with combination of some unique properties. It possesses qualities that are alluring and attractive with its sparkling, gold-like finish. It makes homes, hotels, offices, restaurants and showrooms very attractive.
  • There are also many usages that it provides to the rest of the world. Perhaps, the primary reason for this is the beauty that it holds as it adorns various types of interior spaces from living rooms to bathroom.
  • The amount of zinc in it varies from five to forty five percent to create a range of brasses, each with unique properties. Those with less than 35 per cent zinc are known as alpha brasses. Those with more than 35 per cent are called alpha beta or duplex alloys and are ideal for hot working.
  • Unlike plastic, it is unaffected for all practical purposes by extended exposure to nuclear environment. It produces no harm or hazardous chemical by products.
Uses-
  • The majority of music instruments are made of brass metals. The military still uses the bugle made from brass sheet in ceremonies such as "taps" during flag retreats to signal the end of the day.
  • The arts and crafts industry uses its sheets to make decorative pots, vases, bowls, and many other items. Their sheets are often required in designing and assembling trophies, elevators' exteriors and interiors, wall panels, and lettered and numbered architectural decorative applications.
Benefits-
  • Both residential and commercial spaces are benefitted from its uses. For example, brass tubing is commonly seen on stair railings, foot rails and hand rails.
  • Its finish is very classy and you may have actually used this in your office of work space as well as in your commercial buildings.
  • More often than not, brass sparkles the interest of many people due to its stylish beauty that can be used either in the personal or professional setting.

0

How To Remove Scratches From Brass Surfaces

Posted by Unknown on 21:20 in ,

Brass
When you constantly use the brass objects in your home (such as candlesticks that regularly come out at dinner parties or kitchenware that is used at least once a week) you may notice that, over time, it has developed a number of scratches. If you would like to repair these scratches and return your brass objects to their former glory, all you need to do is follow a few simple steps.

Step 1: Check to see whether your brass has been coated with a lacquer; if so, the scratch may not have transferred to the metal beneath. Buff the objects thoroughly, then apply a cloth soaked with a little acetone to the mark. If it disappears you can simply reapply the lacquer.

Step 2: If the scratch has managed to affect the brass below the lacquer or the object was not lacquered at all, you should begin by polishing the lightest marks you can see with an appropriate polish.

Step 3: If the scratches are a little deeper, you will need to use abrasion to restore the brass. Begin with a gentle abrasive, like a jeweler’s rouge, and buff in a circular motion. Then move onto an emery cloth or steel wool, which you can wipe across the marks. Finish by polishing the metal.

For deeper scratches or for brass objects that you are hesitant to try cleaning up yourself, you can take them to a jeweler or metalworker to have the scratches worked out professionally. Remember to wear gloves and safety glasses when handling the chemicals used to treat brass; this will also avoid fingerprints when it comes time to polish the metal.

0

High standard of Brass

Posted by Unknown on 22:44 in ,
Brass
Brass is an alloy of copper and zinc with differing combinations of properties. Combinations of these properties result in unique structural materials. It is frequently being used to make the least costly machined products. It is in fact the best material from which we can manufacture many other components.


Some of its properties are -
  • Ductility
  • Hardness
  • Conductivity
  • Machinability
  • Wear resistance
  • Color
  • Corrosion resistance
  • Recyclability
It has an excellent thermal conductivity that makes it a first choice for heat exchangers or radiators. Its electrical conductivity ranges from 23 to 44% than that of pure copper. It is one of the first-choice materials for producing many other materials in general, electrical and all precision engineering industries. They are ideal for a very wide range of applications. It has some unique combination of properties that make it indispensable where a long, cost-effective service life is required. This combination cannot be matched by other materials. Also, brass does not become brittle at low temperatures like mild steel. Its products can often be used without needing extra surface protection.

Factors that contribute to low costs of brass components includes-
  • Ease of machining, through which the initial production cost is minimized.
  • The good corrosion resistance property of the brasses plays a key role in reducing the costs of its components.
  • Its long service life is yet another factor that contributes in the low cost of its equipments by reducing the cost of service.

Brasses set high standards for judging the Machinability of other materials. They are available in a very wide variety of forms and sizes to allow minimum machining to finished dimensions. Brass parts and it's components, especially those products whose application in industries require adherence to close tolerances, must be manufactured with attention to detail, right from sourcing raw material to forming, shaping, die-casting, finishing etc.

0

What Does It Mean To ‘Pickle’ Copper?

Posted by Unknown on 22:21 in ,
Copper
When copper has been exposed to the elements, its surface will develop a layer of copper oxide. This can make the object appear dirty and is just plain unattractive, so many people look for ways to remove the layer of oxide. There are a number of chemicals that can be used to treat affected copper; the term ‘pickle’ is one used by metalworkers to describe the solution that is used to remove the oxide.

Step 1: In a plastic bucket, mix together about half a kilo of sodium bisulfate with about 4 litres of water. Together, this creates sulfuric acid and is what you will use to ‘pickle’ your copper. Make sure that you’re wearing safety glasses and chemical-resistant gloves to protect your skin.

Step 2: Take a piece of copper wire that you have twisted into a handle and hook it onto the object that you wish to ‘pickle’. Dunk the object into the solution and leave to soak for between 5 and 10 minutes, or until you feel that the metal has bee cleaned.

Step 3: Using the handle you made, remove the copper from the solution and give it a good rinse to remove any remaining acid. You can then hang the object up by the handle in a well-sunned area so that it can dry.

If you cannot get your hands on any sodium bisulfate, you should be able to find it at any swimming pool supply store. When working with this harmful chemical (especially when in its liquid sulfuric acid form) you should ensure that you are wearing protective clothing and that you are in a well-ventilated area to avoid breathing in the harmful vapours.


0

How to shine tarnished brass with tomato ketchup

Posted by Unknown on 23:10 in , ,

You might have cleaned tarnished brass household items with acetone, lemon, vinegar, acid and many other cleaning elements available in market, but have you ever tried to clean tarnished brass with tomato ketchup? Sounds strange, right? Brass element has tendency to lose oxidized layer after reacting with any acidic elements. Tomato has bleach or acid like nature which when used on brass item can remove oxidized layer. 

Brass Metal
Here is a step by procedure to shine tarnished brass items:

  • Step 1: Put the item in a container, preferably in plastic container.
  • Step 2: Apply the surface with ketchup. If ketchup is not available Tabasco sauce or Worcestershire sauce will also work.
  • Step 3: Leave it for minimum 2 hours then place it under cool running water and scrub with a scrubber containing mild dishwashing liquid.
  • Step 4: Rinse it off with clean cool water and dry with soft cotton towel to avoid scratch.
  • Step 5: To minimize the rate of tarnishing, pour few drops of olive oil then rub with cotton cloth.
  • Step 6: For long lasting shine and to protect the finish, apply multiple coats of car wax paste.

This method is quite useful when no other element is available at home to clean up brass items. Ketchup is something you can always find in your kitchen. For regular items used in kitchen or for decorative purposes, this method can work effectively. For excessively delicate item, it is better to use advised method in the given booklet. Try out this method for your decorative items the next time you don’t find lemon or vinegar at home.

0

How To Remove Metal From The Eye

Posted by Unknown on 23:28 in ,

If your job requires you to work extensively with metal and you are silly enough to do so without the use of the proper safety equipment, one of the injuries that you may be forced to deal with is getting metal in your eye. Whilst it is recommended that you seek professional medical attention for these injuries as soon as possible, you may be able to begin first aid yourself.

metal
First, you will need to decide whether it is safe for you to attempt first aid or whether you should just leave it. If the metals (like brass ,copper or steel) shard is embedded in your eye or is affecting your vision, you should leave it for the professionals. The same goes for if the injury is a result of hammering or grinding.

If you think that it is safe for you to attempt first aid, you will need to wash your hands thoroughly. Then, try and spot the metal shard. Pull your lower eyelid down; look left to right, up and down. Pull your upper eyelid up; look left to right, up and down.

Once you spot the metal shard, you should try flushing it out, but only if it is floating on your eye’s surface. Fill a small glass with a saline solution (or warm water). Then, put your head down, place the glass at the base of your eye socket and tilt your head back slowly. You may need to repeat this process.

If you have been unsuccessful in removing the metal shard from your eye, it is imperative that you immediately make your way to a doctor or even the emergency room. If you think that you have removed the shard but notice that your eye is still irritated or red, you should also seek medical attention as soon as possible.

0

How to ready scrap copper wire for sale

Posted by Unknown on 22:12 in , , , , ,

If you have time and tools, you can earn extra money by collecting and selling scrap copper wires. But for that you should know the ways to prepare them for sale. It is not hard to get copper wires around, but they cannot be sold in their original form. They have to be prepared by removing the insulation. Though the task is labor-intensive and time–consuming but can add value to your scrap. Here is a step solution to remove insulation of the scrap wire.
Scrap Copper

Step 1: If you have long pieces of copper wire, hold its one end in a vice, then using a pocket knife slice the insulation and peel them off. For smaller pieces of wire, use wire stripper to peel off insulation. But make sure when you are doing this, you wear gloves.

Step 2: Keep a watch on price offered in the commodity as they fluctuate broadly. Sometime rate changes within a month. So keep an eye.

Step 3: When you have enough amount of scrap to sell, find a local scrap processing specialist having certified scales.

Step 4: Carry your picture ID while visiting the buyer. These days, buyers ask for IDs to discourage copper theft which have increasingly become common in recent times.

Make sure when you are collecting copper scrap you store them in a safe place. If you are storing them in your garage, ensure you keep it locked all the time. Collect a large amount of scrap copper wire and wait till the price really goes high, so that you get a good return. 

0

How I can create an antique brass at home

Posted by Unknown on 01:53 in , , ,
antique brass
Gone are those days when shiny brass items used to rule the market, it is an era of antique brass. You might have spent hours to shine your sculptures and decorative items, but not anymore because this is now an old story. While antique metals is slowly capturing the market, they are quite expensive and might not be affordable for everyone. If you want to have one such thing in your living room and your pocket doesn’t allow, then you shouldn’t disappoint. Use the given below tips to make your own antique brass item at home.
  • Take any brass item you want to convert into antique, then remove protective layer of varnish from its surface. You can do it using acetone or varnish remover. In case, the brass piece is small in size you can remover varnish boiling it in water for few minutes.
  • Take a brush, dip into a cup of vinegar and apply it on the entire surface of the item. Now leave for some time until it turns into a real antique piece. Vinegar will catch oxygen and allow brass to oxidize faster.
  • Another method you can use it painting the brass metal surface with salty water. This is a good alternative of vinegar but take a little bit more time. However, the result of antiquity you will get is nothing less than an effect created by vinegar.
You can try these methods with any items. Rather spending umpteen grand, it is good idea to get an antique piece right at home. It doesn’t take much effort and time, and the result you get is simply awesome.

0

Using antimicrobial properties of copper


Copper
Is it surprising for you? Most of us have seen copper as utensil, electric wire and machinery part, but can’t think of using them as elements to fight germs. Very rare people know that copper is also a very good antimicrobial element, which can be used in day to day life to benefit our health. It is not just copper, but also its alloys like brass and bronze that are naturally antimicrobial. These metals are quite appropriate to form an item that are often touched or have multiple users.

Antimicrobial copper
Since such items tend to attract and spread germs, increasing the chances of contamination, using copper, brass and bronze fixtures is cost-effective as well as an ideal solution for home. The most common uses of metal in household are in kitchen and bathrooms. In kitchen, you can get sink drains and strainers made of brass metal. Similarly in bathrooms, you can replace washbasin and bathtubs with copper version. In addition, you can also get bronze door knobs, brass push plates and bronze cabinet hardware for complete protection from super bugs that too without using any harsh chemical to clean them. While they help in eliminating house germs, they also add value to the home with their natural beauty. They look fabulous when designed artistically.

Copper has many application areas apart from just bathroom and kitchen hardware. Their antimicrobial and antifungal properties have drawn the attention of medical science and now the metal is widely used in mouthwashes, toothpastes and medicines. It is hard to sense its presence in these items as this is used in very little amount. Copper can make your life least vulnerable if used in given ways.

0

How To Prevent Brass From Tarnishing

Posted by Unknown on 22:51 in , ,
Brass
Brass

Over time, you may have noticed that the surface of your brass objects has tarnished and become dull. Tarnish is a natural process that most metals undergo and occurs due to exposure to the elements (mostly sunlight and moisture). If you would like to prevent your brass objects from tarnishing, you have two options – keep it out of the elements of give it a protective coating.

Option 1: Give the outside of your brass objects a regular coating of wax. To begin with, give the object a quick dust and wipe down to remove the old layer of wax. Then, apply the new layer by following the directions on the wax packaging. In most cases, this will need to be done once a week to ensure protection.

Option 2: Cover your brass objects in lacquer for a longer lasting solution. Take a piece of scrap metal and give it a test spray with the lacquer to make sure that it goes on clear. Then, cover the entire surface of your object. You will need to apply three to five coats to ensure protection.

You will only need to coat the exterior of your brass objects, as the inside is not exposed to the elements and, therefore, does not tarnish. To make sure that the interior of your brass objects is kept nice and shiny, however, you should give it a regular dust and wash with soapy water.

Keep in mind that, after coating your objects with either wax or lacquer, they will not feel the same as they did before. Wax, however, does feel fairly similar to uncoated brass so, if you would like to return this feel, you can apply wax over the lacquer to simulate it.


0

Things to know about lacquered brass

Posted by Unknown on 21:38 in , ,
lacquered brass

Brass is a wonderful metal for decorative elements, but it has a tendency of tarnishing. The longer it stays open in air, the quicker it gets tarnished. This is exactly why this metal is lacquered, especially when they are in the form of decorative piece. While lacquering is so common in brass, most of the people don’t know about lacquering and there are other sets of brass users who can’t differentiate between lacquered or non- lacquered brass.

For people who don’t know about lacquering, it is a process of adding a coating of lacquer on brass. This prevents air getting to the brass that in turn prevents tarnishing. Some brass decorative item manufacturers use polymer or plastic coating to prevent tarnishing. But any coating doesn’t last forever. Time may come when you will find coated or lacquered brass losing its shine. When it happens, mark it that is an alarming sign that means the coating is worn off and air is passing to the metal. If that happens, you would need to strip the metal, clean them and reapply the coating. Or else, if you do not want the coating anymore, keep it as it is and perform periodic cleaning.

Even if you get the metal item coated, you will have to clean them time to time. Remember, lacquer protects the metal from tarnishing, not dirt. To make them look as beautiful as ever, wipe the item with dry soft cotton cloth. If necessary you can use mild or diluted utensil cleaner to remove sticky dirt that are tough to remove when dry. Being little informed about brass lacquering can keep your decorative items shining and beautiful forever.

0

What Tools Are Used To Work Aluminium?

Posted by Unknown on 22:54 in , ,
Aluminium Tools
Many people wrongly assume that the same tools used to work iron can be used to work aluminium. As it is a much softer metal, however, it is important that you use tools that will take this into account. Fortunately, many of the tools used for woodworking can be used on this metal.

  • Saws
    Hand-held or hacksaws can be used on aluminium, providing that you have chosen the right kind of blade. They need to have wide-mouthed teeth and must be made out of carbide to ensure precise cuts.
  • Center Punch
    This is a sharp rod made out of iron that is used for making marks on metal. On aluminium, it is used to etch cutting edges and to mark the position of holes.

  • Aluminium Drills
    Drills
    Hand-held drills are highly useful for working with aluminium, providing that you use a drill bit with wide spirals (to prevent the metal from clogging the bit).
  • Mallets
    You cannot use a hammer on aluminium, as it will create dents. Instead, use a wooden mallet. They can be used for shaping a sheet, fixing it in place or even for hammering in rivets.
  • Screwdrivers
    You don’t need special screwdrivers for working with aluminium - your standard ones will be fine, providing that they fit into screws that are Phillips O, Phillips Square, Phillips O Hex, Cheese or Rounded head.

Once you have finished working your aluminium, there will also be a wide range of buffing and polishing tools available to you to ensure that the shine of the metal is brought back. The tools outlined above, however, are likely to be on hand for most homeowners.


0

How To Estimate How Much Your Scrap Metal Is Worth

Posted by Unknown on 22:59 in , ,
Scrap Aluminium
Scrap Aluminium
The collection and sale of scrap metal can be quite a lucrative business, providing that you pay careful attention to the proper details. Scrap prices are known to fluctuate on a weekly or even a daily basis (due to a number of different factors), and it is important that you keep an eye on these fluctuations if you want to get a good idea of what your metal is worth.

To begin with, you will need to ensure that you have separated your scrap into its relevant types. The reason for this is that each metal will have a different worth, and it is easier to work out how much you will make if you do each type separately.

Scrap Copper
Scrap Copper
You will then need to begin developing good relationships with the scrap metal dealers in your area. Prices can fluctuate depending on who you are dealing with, so it always pays to compare the prices offered by a few local dealers and going with the one who offers you the most. By developing a good relationship with this person, you will have an ‘in’ whenever you want to know how much aluminium or copper is going for.

You could also try visiting your local recycling centre or doing some research online to see what other people are currently paying for scrap. You might be able to get your hands on a scrap metal pricing chart, which could be invaluable for determining the best times to sell.

At the end of the day, the worth of your scrap metal will differ depending on the time of year, month and even week that you are trying to sell it. Once you have been buying and selling for a while, however, you will begin to become familiar with the trends in pricing, as well as developing an instinct for when you should sell and when you should hold onto your metal for a little longer.

0

How To Test Brass At Home And In The Workplace

Posted by Unknown on 23:12 in , ,
Brass
Brass is a man-made alloy that is made up of varying combinations of copper and zinc. Other metals can be added to the mix, however, in order to create brass that embodies different properties, such as colour and strength. If you have an item that you think might be brass, there is a way to test it both at home and in the workplace to determine whether you are correct or not.

Step 1: Weigh the metal (in pounds) using a set of scales. Then, convert this number to kilograms by dividing it by 2.2046 (since this is how heavy a single kilogram is in pounds).

Step 2: Take a graduated beaker and fill it with water until you reach the 100ml line. Drop the item you suspect is brass into the beaker, watching how high the water level rises. Record the new level. Then, subtract the first water level from the second, which leaves you with the volume of the item.

Step 3: As a milliliter is equivalent to a cubic centimeter, you are now able to convert the volume of the suspected brass item into cubic meters by dividing it by 1,000,000 cubic centimeters per cubic meter.

Step 4: Now you can divide the mass of the item by the volume, which will leave you with the density of the item in kilograms per cubic meter. If the density falls into the known range for brass, you can conclude that that is the metal you are working with.

Whilst this is not the easiest of tests to complete, as you are required to have a number of unusual tools on hand, it is one way that you can definitively determine whether the metal you are working with is brass or not. If the density is not in the known range for brass, check other ranges to work out what type of metal the item is.

0

Why aluminium is widely used in construction

Posted by Unknown on 01:35 in ,

Aluminium
These days purchase rate of aluminium is recorded all time high in construction industry. A decade back steel was considered the only material used in building structures, however in recent time things have changed and the uses of aluminium has rapidly increased in past few years. But what has made this metal so much in demand? Well, there are various for this.

Firstly, they are resistant to corrosion that is highly beneficial for buildings as they are likely get wet in almost every season. It is not necessary that only rain can be the cause of corrosion, but moisture in the air can also decay metallic element. However, aluminium cannot alone be 100% resistant to corrosion, because they have the tendency to oxidize. Therefore it has to be mixed with other alloys.

Secondly, it has light weight. Anything made with aluminium is lighter in weight that in turn makes the product easier to install and creates less pressure on the structure. With this metal a large varieties of product can be created, for instance door frames, windows, skylights, cladding, gutters and roofing. Another benefit of using aluminium cladding which is insulated is that they are thermally efficient. They can keep home warm in winters and cool in summers. The plus point is that single layer of insulated aluminium cladding is equally effective as four inches brick or stone wall.

Next, aluminium can be cut into any shape and size. It can be welded, curved, bonded and tapered for any job because of its ductile nature. Also, it can be a good beauty booster for building. By painting this metal with desired color and using it with other material it can be used as beauty feature in any building. With so much of benefit, it is not surprising if they are being widely accepted in construction.

0

How To Cut Copper Sheeting

Posted by Unknown on 02:29 in ,

If you regularly work with copper sheeting as a part of your day-to-day working tasks or a weekend hobby, you may have come across situations that have required you to cut it into a certain shape. Thankfully, there is no need to pay a professional to do this for you, as, with the right tools and correct measurements, you will be able to cut through your copper sheeting by yourself.
Copper
Copper Sheeting

Step 1: Lay the copper out on a flat surface that is large enough to support the entire sheet (a workbench is usually sufficient). Take a tape measure and begin working out the dimensions that you require, marking them onto the sheet using a texta or grease pencil and a straight edge.

Step 2: Elevate one end of the copper and support it with your free hand. You need to ensure that there is enough clearance for your metal cutting shears or electric jigsaw to fit underneath.

Step 3: Begin cutting the copper with the shears or electric jigsaw, making sure that you move forwards with slow and steady motions. Try to complete individual lines in one action.

Step 4: Take the deburring tool and pull it firmly across all of the freshly cut edges; this will take the sharp edge off and make the copper much safer for handling and transportation.

Continue cutting your copper sheeting in this way until you are left with your desired shape or size. Regardless of whether you are using the manual sheers or the powered jigsaw to cut through the metal, you will need to wear safety glasses and thick work gloves when working to ensure that you are protected.


0

How To Melt Down Scrap Metal

Posted by Unknown on 23:16 in , ,
If you are an avid scrap metal collector or you have found that you have mounds of junk lying around your workshop, shed or garage, you may be wondering how to best dispose of it. One way of doing this is to melt it all down into one larger piece of metal, either to sell to a scrap dealer or to make something new out of yourself. If either of these solutions appeals to you, you can use this guide to help you properly melt the scrap down.
Scrap Metal
Scrap Metal

Step 1: Separate all of your scraps according to type. This is highly important, as different metals will melt at different temperatures and this knowledge will allow you to adjust the heat accordingly.

Step 2: Put all of the scrap metal of one type into a crucible that is large enough to fit all of the pieces in. Pour a layer of baking soda over the pieces.

Step 3: Take a butane torch and adjust the flame according to the type of metal that you are melting. Copper, brass and gold, for example, will melt between about 926 degrees Celsius and 1,100 degrees Celsius.

Step 4: Put on a pair of thick work gloves and direct the torch’s flame towards the crucible. Wait until the scrap metal has melted into a liquid form. You can speed up this process by having a second person hold a second butane torch to the crucible as well.

Step 5: Once the metal has been liquefied, you can pour it into an ingot or other type of mould in order to form whatever shape you want. To avoid burning yourself, use tongs to move and tip the crucible.

You can repeat the same procedure for each of the different scrap metals that you have in your possession. If you are taking the materials to a scrap dealer, it is recommended that you place the liquefied material into ingot forms (as this are easier to weigh and transport).

0

How To Properly Sterilize Metal

Posted by Unknown on 22:17 in

Unfortunately, if metals are not stored correctly before they are used in production, they can be subjected to germs that like to live on the surface and could cause infections amongst the workers who are exposed to them. In order to prevent illnesses and diseases caused by the germs, metal must be sterilized before it is worked. This can be achieved by following a few easy steps:

Step 1: Place a pot onto a stove that is large enough to submerge the metal you will be working with in. You will also need to thoroughly wash your hands using soap and warm water, then put on a pair of sterile gloves to prevent re-contamination of the material.

Step 2: Give the metal a thorough clean using a solution of mild soap and warm water. You can then rinse the item with running water, checking it carefully for any traces of soapsuds.

Step 3: Place the metal item into the pot and cover it with water until it is completely submerged. Place the lid on the pot and turn the stove on to a setting that will cause the water to boil. Once the water is boiling, leave it like this for a full 15 minutes.

Step 4: Using a pair of oven mitts, take the pot off the stove and place it onto a heat resistant surface (such as a wooden chopping board). Leave the pot and the metal inside to cool to room temperature.

Step 5: Tip all of the water out of the pot, then change to a new pair of sterile gloves and remove the metal item. It should be used for working (or whatever use you have in mind) immediately.

As you can see, the sterilization process is a fairly simple one. The bigger factories and production companies are able to sterilize even the largest pieces of metal in a similar fashion, ensuring that their workers are not exposed to germs that could be potentially harmful.


0

How To Remove Paint From Brass

Posted by Unknown on 21:19 in ,

If your home is filled with a number of antique metal items, it is likely that they have been constructed using either solid or plated brass (as this was a very popular metal at the time). Back when these items were produced, however, it was also very popular to paint the metal into a desired colour. If you would like to restore your brass items to their former glory by removing the paint, here’s how you do it:
Brass
Brass Rods

Step 1: Make sure that you are wearing the proper protective gear, as you will be working with some poisonous chemicals. At the minimum, you should be wearing a facemask, thick work gloves and goggles.

Step 2: Pour some paint thinner into a metal bucket. Ideally, you should have filled the bucket with enough paint thinner that the brass object will be completely submerged. If you are removing paint from a larger brass object, you should instead soak a cloth or a toothbrush in the thinner.

Step 3: Place the brass item into the bucket and let it soak for several minutes (skip this step if your item is much too large to fit).

Step 4: Take the toothbrush or cloth and use it to scrub at the painted areas of the brass. You will need to do this until all of the paint has been removed.

Step 5: Once all the paint has been removed, you will need to rinse the brass item thoroughly in warm water. Then, apply a specialized cleaner and run it into the item with a clean cloth. To finish, buff well with a proper buffing cloth.

Remember that, as paint thinner is a highly poisonous substance that could cause serious health problems, you should only use it in a well-ventilated area (preferably outdoors). If you do happen to get the thinner on your skin or in your eyes whilst cleaning your brass, you should go to your local emergency room immediately.

Copyright © 2009 Metal Qualities All rights reserved. Theme by Laptop Geek. | Bloggerized by FalconHive.